3. Add Slides and Content
| Site: | myStudentSkillsHub |
| Course: | STU-403: Basic Skills in Presentations |
| Book: | 3. Add Slides and Content |
| Printed by: | Guest user |
| Date: | Saturday, 11 July 2026, 11:00 PM |
Description
Now that we have a PowerPoint document, and the document has been set up correctly we can start populating and creating slides. We will use the content created in Lesson 01 as per the Brief at the start of the unit.
1. Title Slide - Adding Content and Inserting Notes
The theme we selected already has a title slide and we merely have to add our content to the fields available. We can also add our title slide script to the notes for ease of rehearsing and presenting.
Complete the following text to add the title slide content:
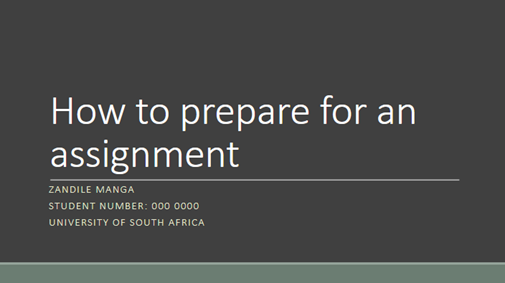
1. Click in the “Click to add title” textbox and type in the title “How to prepare for an assignment”
2. Click on the “Click to add subtitle” and enter your name, student number and university.
3. Click on the View ribbon and then on Notes and add the following script adjusted to your information:
“Good afternoon, everybody! My name is Zandile Manga, I am a student and mentor at the University of South Africa. Today I want to share with you information on how to prepare for an assignment.”

The tile slide is now complete, and you have learned how to enter text into the title textbox fields and how to enter notes.
We can continue to add a new slide with the presentation’s objectives in the next section.
2. Objective Slide - Inserting a new slide and bulleted list
We will add a new slide and use a bulleted list to introduce the objectives of the presentation. Complete the following steps:
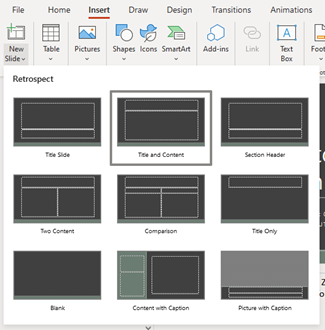
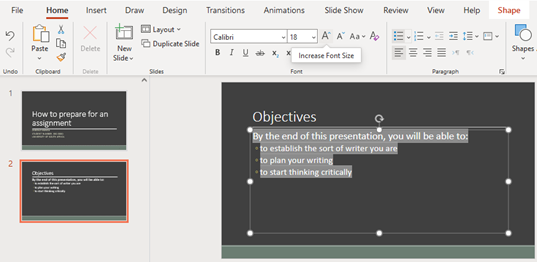
1. Add a new slide by selecting the Insert ribbon and then clicking on New Slide dropdown arrow and then finally select the “Title and Content layout”. This will insert a new slide and navigate to the new slide.
-
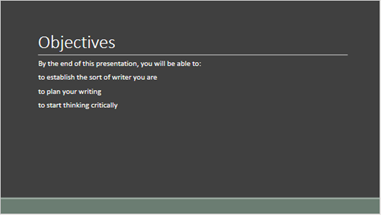
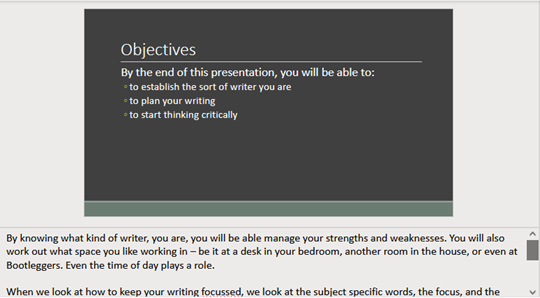
On the new slide, click on the “Click to add title” textbox and type in Objectives
-
Click on the “Click to add text” textbox and type in the following:
By the end of this presentation, you will be able
to establish the sort of writer you are
to plan your writing
to start thinking critically
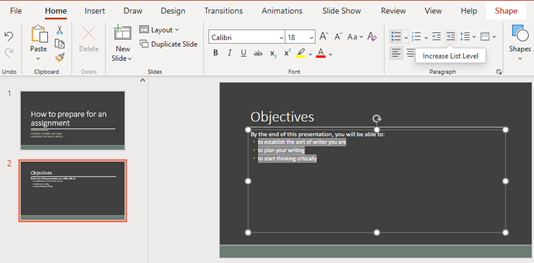
4. Select the three objectives and then from the Home ribbon select the “Increase List Level” option.
5. The font is very small and might impact the readability of the slide for the audience. Select all the text in the textbox and click on the “Increase Font Size” until the font is big enough.
-
On the Notes for this slide insert the following script created in Lesson 01:
By knowing what kind of writer, you are, you will be able manage your strengths and weaknesses. You will also work out what space you like working in – be it at a desk in your bedroom, another room in the house, or even at Bootleggers. Even the time of day plays a role.
When we look at how to keep your writing focussed, we look at the subject specific words, the focus, and the limitations of your assignment.
Of course, the kind of writer that you will influence the kind of planning you do but you cannot start writing without having a plan and knowing your content be reading critically.
The objective slide is now complete, and you have learned how to insert a new slide and add a bulleted list.
We can now continue to add the content slides of the presentation.
3. Main Idea Slide 1 -Textboxes and Images
We will add a new slide and use images and textboxes to support our script in explaining our first main idea.
Complete the steps below:
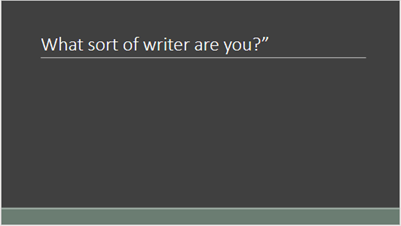
- Start by inserting a new slide, but this time choose the “Title Only” option.

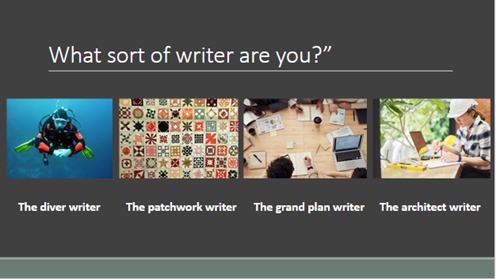
2. Add the following title to the slide: “What sort of writer are you?”
3. From the Insert ribbon, click on the “Text Box” option. This will insert a textbox on the slide.
4. Select the new text box and replace the holder text with “The diver writer”. Increase the font size to 24pt, Bold the text and centre the text by using the Font and Paragraph tools on the Home ribbon.
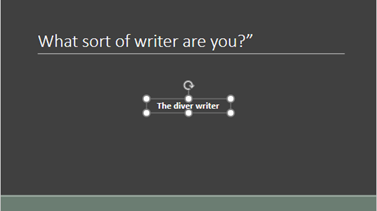
5. With the textbox still selected, hover your mouse or curser on the border until the icon changes to four pointing arrows and then drag the textbox left and more towards the bottom to allow space for four images and textboxes as per the image below.
-
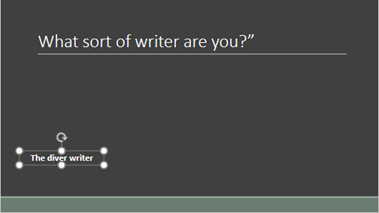
Insert three more textboxes with the same formatting as the previous one and aligned and spaced across the slide with the following text:
-
The patchwork writer
-
The grand plan writer
-
The architect writer
7. If you have difficulty aligning and distributing the textboxes, you select all the textboxes, by holing in shift and clicking on the textboxes or holding in the right mouse button and dragging the square that appears over the text boxes, then use the Arrange > Align > Align Top and Arrange > Align >Distribute Horizontally options. You can also use the dots that appears on the textbox border to scale the textbox up and down.

8. Your slides should now have four textboxes that are aligned and distributed evenly.

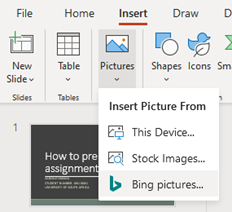
9. We can now add four images to represent the writer types. On the Insert ribbon click on the Image > Bing pictures… option.
10. On the Bing image search box that appears, search for diver and select an appropriate image and finally click on the Insert button.
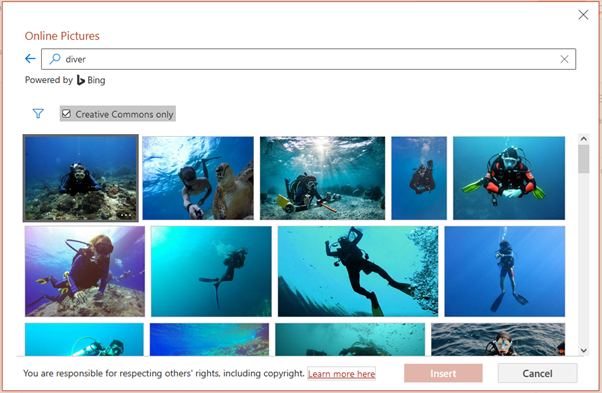
11. Scale the image and align the image above the “The diver writer” textbox.

12. Add appropriate images following the same steps as above for patchwork, grand plan and architect and arrange them above the relevant type. Your images might be different, but the slide should have the following layout:
-
Your slide now contains all the required information to support your script and you can now add your script developed in Lesson 1 to the notes section. Below is an example script to add:
Divers start to write early on and so find out what they want to say. They work towards a plan instead of with a plan.
Patchwork writers analyse the topic into sections and then combine the sections with linking words and transitional phrases.
The grand plan writer does not start writing until they have an almost complete picture of their essay in their heads.
Like an architect, the architect writer first has to have a structure before they can start writing. They create complex plans or lists early in the writing process.
So which kind of writer are you?
The first main idea slide is now complete and you have learned how to insert textboxes and images.
We can now continue to add the second main idea slide to the presentation.
4. Main Idea Slide 2 - Videos
We will add a new slide and use a video to support our script in explaining our second main idea.
Complete the steps below:
1. Start by inserting a new “Title and Content layout” slide.
2. Add the following title to the slide: “Planning your writing”
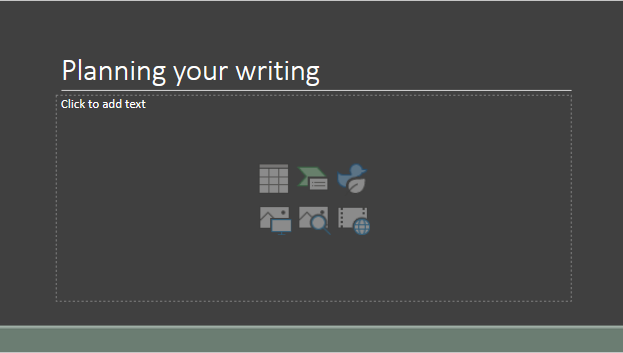
3. Click in the content area where is says “Click to add text” and then select from the Insert ribbon the Online Video option.

-
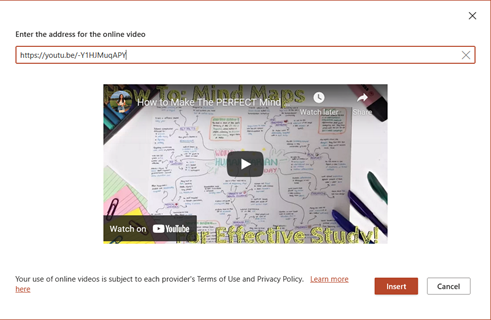
Search for a video on YouTube that explains in five minutes or less on how to create a Mind-Map or Spider Diagrams and copy the URL to the video. Alternatively, you can use the following video URL:
-
Paste the URL of the video in the field under “Enter the address for the online video” and then click on the Insert button.
6. The video is inserted into the content area, and you can use the Dots on the border to make the video bigger

7. Your slide now contains all the required information to support your script and you can now add your script developed in Lesson 1 to the notes section. Below is an example script to add:
Planning is about organisation as well as prioritisation. Some of your information will be essential but other information can be left out because of the word count or the limitations of the question.
Even if you start off with a sketchy plan, put it down because it’s easier to change or adapt a plan than to organise and prioritise information after writing. Some plans can be visually attractive like spider diagrams and Mind Mapping™ but outlines and lists give you a clear idea of the structure and sequence of the information.
I will now show you a short video clip that demonstrate the diagrams and Mind Mapping™ procedure.
The second main idea slide is now complete, and you have learned how to insert online videos to slides.
We can now continue to add the third main idea slide to the presentation.
5. Main Idea Slide 3 - Insert SmartArt Objects
We will add a new slide and use a SmartArt to support our script in explaining our third main idea.
Complete the steps below:
-
Start by inserting a new “Title and Content layout” slide.
-
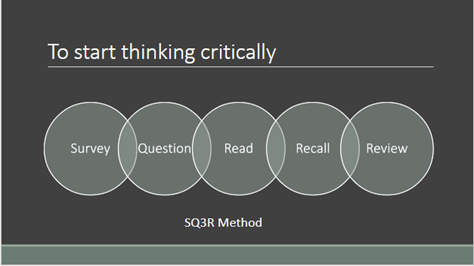
Add the following title to the slide: “To start thinking critically”.
-
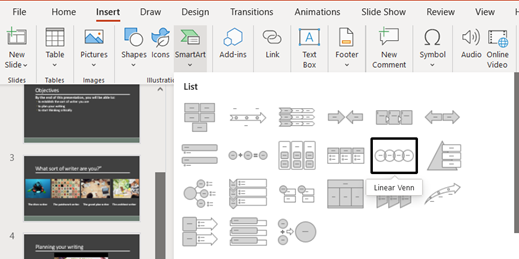
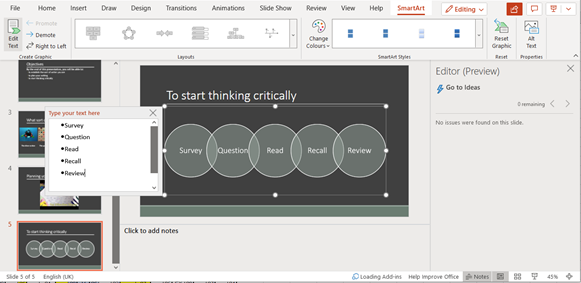
Click in the content area where it says “Click to add text” and then select from the Insert ribbon the SmartArt > Linear Venn option.
4. The Linear Venn diagram will be inserted in the centre of the slide with a popup box to enter your text for the circles. In the popup box where is says “” enter the following words on separate lines in order:
-
Survey
-
Question
-
Read
-
Recall
-
Review
6. The SmartArt is to explain the SQ3R method, but is not very clear that it relates to the SQ3R method. Add a textbox at the bottom of the SmartArt with the text “SQ3R Method” with a font size of 28pt and text centred.
-
Your slide now contains all the required information to support your script and you can now add your script developed in Lesson 1 to the notes section. Below is an example script to add:
The SQ3R method consists of five steps:
Survey - Prepare yourself for reading by surveying the content. To ensure you clearly know what the introduction and conclusion tells you.
Question - Formulate questions for each heading to help engage and concentrate.
Read – Read one section at a time with your questions in mind and formulate new questions where required.
Recite – Force your mind to concentrate by stopping and reciting the main points.
Review – After completion of a section recite your questions and see if you can answer them.
The information you gain from reading is very important and the SQ3R method can assist you to retain and understand what you have read.
The third main idea slide is now complete, and you learned how Smart Art to slides.
We can now continue to add the final slide.
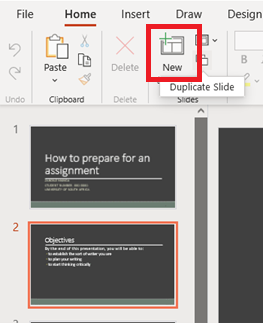
6. Conclusion Slide - Duplicating and Arranging Slides
We will now add the final slide to the PowerPoint presentation, the conclusion slide. Since the conclusion slide relates to the object slide, we will duplicate the objectives slide and move the slide to the end.
Complete the steps below:
-
Select the Objective slide and then click on Home > Duplicate slide. Note: You can also duplicate a slide by right-clicking with your mouse on the slide and from the menu select Duplicate.
-
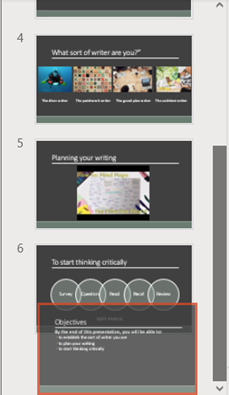
Select the new slide and then while holding in the left mouse button, drag the slide to the end of the slideshow.
-
Change the title of the slide to Conclusion.
-
Update the text of the slide to the following:
You should now know the importance and how to:
establish the sort of writer you are
plan your writing
start thinking critically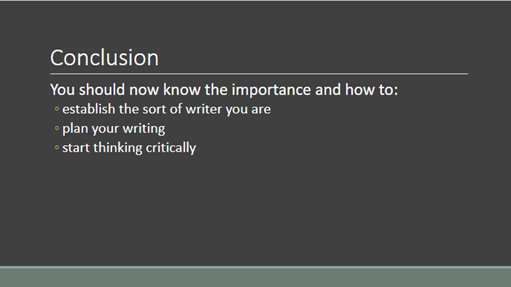
-
Your slide now contains all the required information to support your script and you can now add your script developed in Lesson 1 to the notes section. Below is an example script to add:
In this short workshop, we looked at how to recognise our own strengths and weaknesses, we looked at how to focus on the assignment and to plan our writing. I would recommend that you save the document as the university expects you to work hard and these workshops are designed to help you. I also learnt something by working through the document and I would like to thank the mentoring programme for the opportunity to run this workshop. Before we have tea, I will answer any questions you have.
The conclusion slide is now complete, and you learned how to duplicate and rearrange slides.
Now that the PowerPoint presentation is complete, we will look at the tools available to play and share the slideshow.